


 |
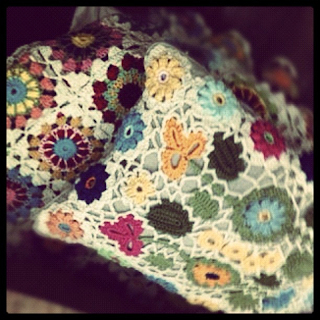
| Photo Credit: Olly Hunter, with Instagram by ZB |
Step 1: Learning the skills
The basics:
Obviously, you will need crochet hooks and yarn/wool. I got this kit from Amazon with 22 aluminium and steel hooks just because it was the best offer they had (£8.95), but as to start with you will only need 1x 4mm hook, you can spend less if you want. There is a lot of discussion out there about which is the best type of hook (bamboo, steel, hard plastic, aluminium...) and after reading a lot about it, I figured out you need to try a few and make up your own mind.
Regarding yarns, some people say that cotton ones are the best option for beginners. I kind of ignored the advice and regret it. As I knew I was going to mess up my first attempts, I bought the cheapest wool I found and it is really annoying when the threads start to come apart when you're in the middle of a stitch. I guess as soon as I get a bit better, I will move on to cotton or a more expensive yarn. The ones I got were Sirdar Country Style, from John Lewis, for about £2.95 a ball. If I can give you any advice it is do not buy this one!
Getting started:
There are hundreds of videos on Youtube that might help you with the first steps. In my case, however, I still prefer the good old books, so I got 200 crochet blocks from Amazon after reading it was a good option for who is learning. Although the title is a bit of a lie (they count the different colour patterns to justify the 200), it's proven to be a good book, although my attempts so far weren't that successful.
After some online research, I stumbled upon this blog by Megan Turnidge that lead me to a very good website by Garn Studio, where I came across this lovely pattern below. It's saved on my favourites and it's pretty much what I am trying to achieve in the long term.
 |
| Photo Credit: http://www.garnstudio.com |
Understanding this new language:
It didn't take long for me to realise that apart from learning the skills (how to hold a hook, the movement with your fingers, keep the consistency) I would have to learn this new language in which crochet patterns are written in.
Any beginners book should have (like the one I mentioned above has):
1. A glossary with what the abbreviations mean (please, do get familiarised with them before you start, otherwise it can be very off putting).
2. A "how to" diagram with pictures of the most common stitches.
NOTE: Understanding the instructions is for me the hardest, but also the most important thing. If you read it wrong, you will very likely realise your mistake only when you're way further down your pattern and going back over and over (although common when you're starting) can be a bit frustrating.
If pictures are not enough, then you should make the most of online video tutorials. I found Youtube a bit of a waste of time. Way too many videos, most of it useless. Go for the specialised websites, like the one I mentioned before, Garn Studio. I found these videos from them very useful:
1. Chain stitch (ch)
2. dc (US) / tr (UK)
3. Ring of chains
4. Slip stitch (sl st)
5. tr (US) / dtr (UK)
NOTE: I've noticed that apart from the differences in nomenclature US vs UK, there are often some variations from tutorial to tutorial. I don't know why, but it is something you should definitely be aware of. What my book calls "tr" is different form the tr (UK) in Garn Studio video. So every time you come across a new pattern, it's good to check if they have a glossary of the stitches they use.
