Thursday 29 November 2012

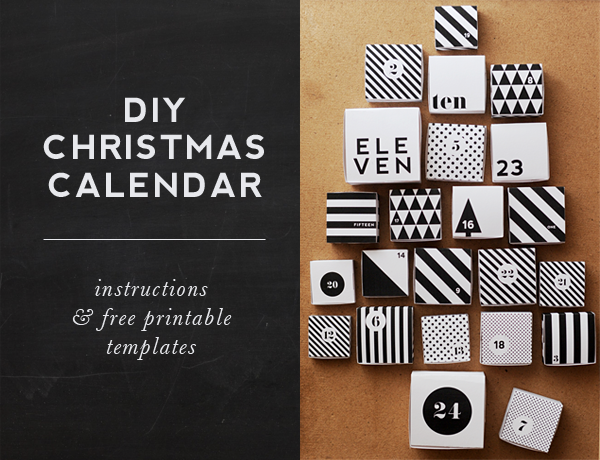
Black & White Christmas (advent) calendar!

So it's official. December is knocking at our doors! We could go over and over again about how fast this year has passed, but probably, by the time we finished talking about it, it would be Christmas already... So let's skip this bit and move on to what matters.

In Brazil we are not used to advent calendars. I had no idea of this tradition of giving kids a treat everyday of the month until Christmas day. But now I know about it, I think it sounds really fun. I've seen quite a few recently on my searches through the web, but this one I chose to share here is definitely the most original one I came across. Not to mention that you will only need card-stock and a printer (well, also some scissors & glue, but you're used to it...).

Free printable advent calendar - I know Christmas is full or reds & greens, but is it wrong to love Black & White? :)
I know Christmas is full or reds & greens, but is it wrong to love Black & White? :)

The calendar above is signed by Michaela, from Hey Look, a wonderful Finnish website full of DIY tips! She also made the pattern for these 24 lovely little boxes available as a freebie, just follow the link to her original post (in both English & Finnish) to download it! Note: A step-by-step tutorial showing how to assemble the boxes is also available.

Free printable advent calendar - I know Christmas is full or reds & greens, but is it wrong to love Black & White? :)
Use each little box to hide a treat for your kids as Christmas approaches!


Tuesday 27 November 2012

A little bit of self promotion

If you subscribe to the M&P newsletter your know I've been extremely busy and will be until mid-December. I am in the middle of a production, but after that I should take a few days off and will be able to dedicate some time to make new projects. In the mean time, I thought of sharing here the last few additions to my Etsy shop.

It would be great to know your thoughts! :)

Vintage inspired crochet coasters based on a 1800's pattern
Photo Credit: Zaira Brilhante, with Pentax K-x

Vintage inspired crochet coasters based on a 1800's pattern published in "The People's Handbook Series - The Ladies' Model: Fancy Work Manual" in 1893. These granny like, shabby chic handmade items make lovely gifts! This set contains 2 x each colour - driftwood, seashell pink and retro russet.

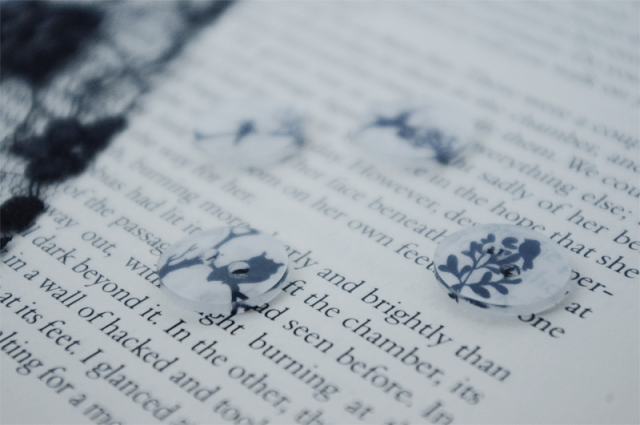
Handmade vintage looking buttons
Photo Credit: Zaira Brilhante, with Pentax K-x

These buttons were decorated either by me or my husband, Mr. Hunter - as he likes to join my DIY adventures sometimes. I made them from scratch and they are waterproof and smudge-proof. 

Lovely kit for you to make your own star garland
Photo Credit: Zaira Brilhante, with Pentax K-x 

This is a lovely kit for you to make your own star garland. Great to get the kids together helping with the decoration. Each star is about 4" size (from point to point), just below 10cm. They are cut from old books, so have a yellowy tint to it, which gives them a vintage charming look. Each kit comes with 20 stars & 2.5 meters of beautiful raw twine, for you to attach your stars to and decorate your wall, doorway, Christmas tree, kids bedroom... Be creative!

Monday 26 November 2012

Getting ready for Xmas with paper trees

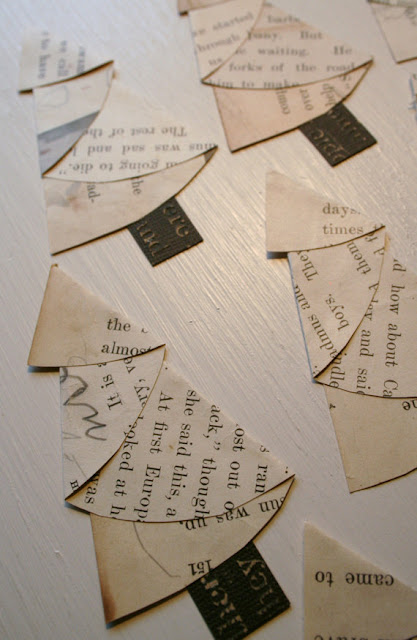
Have you thought of making this year's Christmas cards yourself? I wish I had a little bit more time on my hands to do it, particularly since I saw this picture and had the idea of sticking these trees to stock paper to make cards.

The funny thing is that at first sight, I thought these were really easy to cut and fold, but it actually took me a few attempts until I got it right. The actual shape you need to cut is not a perfect semi-circle, as I originally thought. So I decided to quickly put together a free printable you can download and use as a stencil. Just follow this link! (please, if you want to make it available on your website, link to this page)

Getting ready for Xmas with paper trees
Photo Credit: Gunny Sack Race, on Etsy

I though of using ribbons to do the bottom part. You can also add other bits & bobs to it and decorate to make each one unique. Let your creativity do the job! Just as a note, your final tree, following my pattern, will be 8cm tall (about 3 1/8") by 6cm wide (2 1/4").

Saturday 24 November 2012

Personalised watercolour cards

This time, two years ago, I thought I had all the time in the world before my wedding, in June 2011. I couldn't be more wrong! Time flew... As it always does when you're under pressure... However, the saying "time flies when you're having fun" was also true. I enjoyed making all the bits & pieces of my DIY big day so much, that I had to keep on going even afterwards... (I could say about M&P that it all started with my wedding!).

I find this technique a bit tricky, as it requires a fairly steady hand (definitely not my fortĂ©). However, Megan, editor of Glamour & Grace, breaks it down step-by-step and the final result is just too cute for us not to try re-crating! 

Personalised watercolour cards
Photo Credit: Glamour & Grace. Although you can follow the template, each card will be wonderfully unique and special!  

From bridesmaids cards to pretty much anything you can come up with, aren't these just gorgeous?! And the tutorial comes with both card & envelope templates as free printables! We couldn't ask for more.

Apart from the usual crafter kit (scissors, glue, scrap-paper for the envelopes, etc...) the specific material you will need for this tutorial is:
  • Watercolour paper 
  • Watercolour paints (Megan says the cheap Crayola will work just fine)
  • White coloured pencil or colourless blender pencil (she recommends Prismacolor brand)
  • Medium flat paintbrush
You will need a few paper towels as well, just to keep your cards and work surface neat and clean!

Another wonderful tip is to place the cards against a window to help you tracing it over the template! A cheap solution for those without a light box.

Visit Glamour & Grace for the full tutorial

Friday 23 November 2012

The most wonderful felt robots!

Updated! Check the bottom of the post for an update on the 20th January 2013.

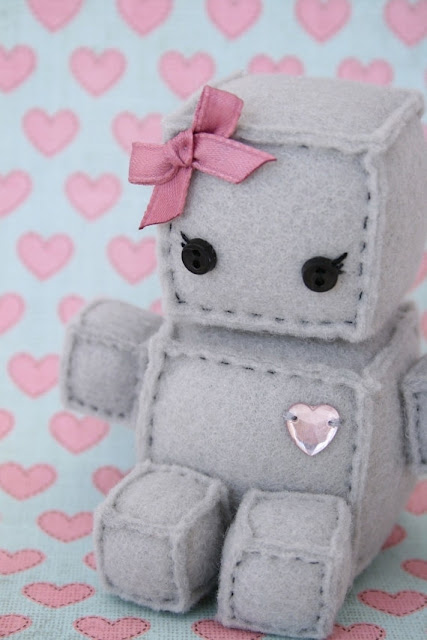
It doesn't get any cuter than these. Mr. Hunter and I joke when we see something really sweet saying that it makes our hearts melt. Well, this definitely has done the job. Etsy shop Little Brown Byrd is responsible for this and a series of other lovely and creative robots using not only felt, but denim and other types of fabric.

I haven't tried to make these yet, but I have a feeling it's pretty simple. Once I have a go at it, I will make my pattern available here (it might take some time though, as I am pretty busy with work until mid-December). In the mean time, if you print your squares on a freezer paper sheet and stick it to the felt before you cut it, the process becomes a lot easier. Check this link for a quick run through on how to work with fabric and freezer paper. I just ordered some sheets from Amazon - this was the cheapest option among the ones made to fit an inkjet printer. 

The most wonderful felt robots!
Photo Credit: Little Brown Byrd

1. Start by sewing together the cubes that make the arms & legs. I would make sure I double my thread just to make it stronger. For the filling, I use the supersoft 100% polyester by Minicraft. 

2. Then, attach the front of the body to its bottom and move on to adding the legs. Attach the arms to the squares that will go on each side and sew them to the body (front & bottom) that you already started. Leave it aside while you move on to the head. 

3. Add the buttons that make the eyes to the front square of your head cube. If you want the eyelash effect, this is the time to do it! You can also add the bow or any other accessory you choose. Add the other sides leaving the bottom for last and before you close it, add the toy filling. 

4. Now go back to the body... Add the top part of the body to your 4 piece set (front, bottom & both sides) and sew the head to it. The only bit left for you to do is the back. Add the final bit of toy filling and close it. VoilĂ ! 

Please, if you have a go, don't forget to share the pictures with me via @craftyblog, Facebook or email! =)

..:: :: UPDATES :: ::..

So I finally had the chance to do this! And I am in love with Sofia... It was much simpler than I thought to cut the felt, I didn't need to use the freeze paper.

Sewing the dices together takes time, but it's sort of second nature. You place one square over the other and sew the two together, than move to the next side, without fastening your thread, you just keep adding sides until there's only one left. This was the only time I had to fasten the thread and start again.

As promised, here are the measurements I used:

Body = 7.5 cm square
Head = 5.5 cm square
Hands & Legs = 3.5 cm square

If you don't want to have the trouble to make one, Sofia is for sale on my ETSY shop :)

Below some pictures I took with my phone that show some key parts of the process.

Photo Credit: Zaira Brilhante, with iPhone 4S

Wednesday 21 November 2012

Simply gorgeous bottles...

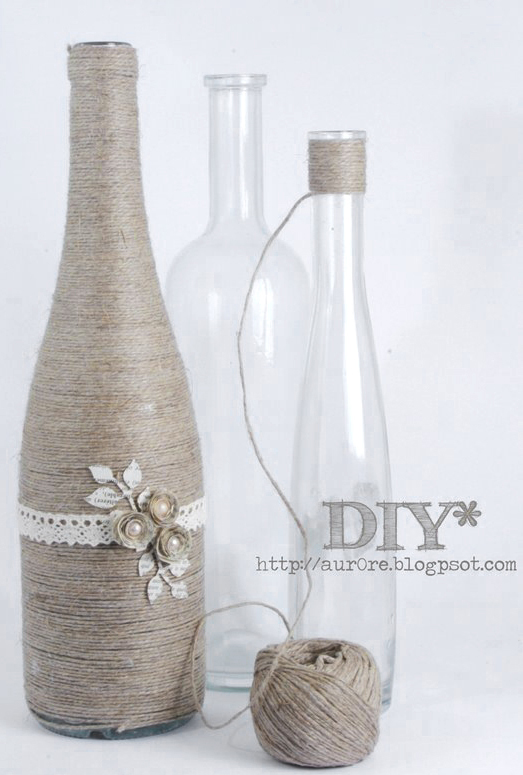
This is another tip for those planning a DIY wedding and want to keep it gorgeously on a budget. Twine makes miracles! I made these for my wedding after seeing this tip in a bridal magazine and it was great I came across this picture recently, as it reminded me to post it here!

There is no secret, the image is self-explanatory. But if you want a more consistent finish, just brush the bottle with mod-podge. There are plenty of places (from flea markets to Ebay) where you can get vintage looking bottles. Funnily enough, the most cost effective option I found when browsing for my wedding was to buy lots of elderflower water. It helps that Mr. Hunter loves to drink it, otherwise I wouldn't know that to do with the content... Two brands with beautiful bottles are Belvoir and Bottle Green.

Simply gorgeous bottles...
Although this pic credit is Aur0re.blogspot.com, I couldn't find the post with it!

At the time, I used a "sticky stuff remover" (that's is literally the name of the product) I found on a crafts shop to remove the labels and glue residues. However, I noticed this was a quite messy (and oily) process. Most recently, I found out by accident that stainless-steel scourers (those heavy duty silver sponges we find at the supermarket) work wonders on glass and, somehow, don't scratch it!

For the details, add some lace, tiny burlap flowers with pearl finish pins and cut the leaves out of that old yellowy book that helped us before in so many projects (are there still any pages left in yours? Mine is almost gone!).

Monday 19 November 2012

Wine cork giraffe!

When you think you've seen everything... I confess I am not a big fan of projects with wine corks. I don't know why. Maybe because they've been used over and over and sometimes people push it a bit too far for my taste. Anyway, it takes more than stamps, key-rings or place-mats to impress me when it comes to DIY using these bottle stoppers.

However, even I had to fall in love with this tutorial. After owls and elephants, it's time for giraffes!

Wine cork giraffe tutorial
This has to be one of the cutest ways to use wine corks I've seen!

This is a wonderful tutorial by Ashley Hackshaw, a truly inspirational DIY & Crafter. You cannot visit her website without clicking in the "about me" section. Some lessons we live, some lessons we learn through the experience of people like Ashley. A true star!

What you will need for this tutorial is some wire clothes hangers (to make the structure of the body), newspaper (to give it some filling), packing tape, wood glue and corks, lots of them! For the full "how to" visit www.lilblueboo.com.

Wine cork giraffe tutorial
Trust me, it is as simple as it looks! Check the full tutorial and have a go at it!

Saturday 17 November 2012

Project Life - the beginning!

Finally the time has come. I was going to wait until 2013, but once I received my kit I couldn't contain myself. I am officially in love with Project Life. So what is it? You will see out there lots of ways to describe it. I can't take my pick between a fancy scrap-booking tool or a very visual and cute diary... I just had to start one!

Since early this year I went back to my roots of "writer". I decided to keep a diary, but I noticed it was getting more and more visual... Perhaps as an influence of this age. Soon after, I started M&P, importing a few old posts from my previous - and dormant - blog (the reason why you see a big gap between February & June posts).

I am officially in love with Project Life
From day 1 to the last update... An insight on my old "project life" book. Taken with my iPhone

It didn't take long until, during one of my adventures through Pinterest, I found beautiful pictures of what for me looked very much like my diary, but in nice big plastic wallets, that would make my life much easier... However, to find them for sale in the UK wasn't as easy - thus taking me this long to get it! Finally, I came across Becky Higgins and the solution for all my problems! From that moment on, I was determined to change from my simple paper notepad to the wonderful Project Life kits...
I am officially in love with Project Life
Sample of a traditional Project Life. Pages by Connie Tacazon, from Becky Higgins. 

Well, this was just an introductory post as Project Life is also a new section here. Instead of keeping an label with "journal" items, that I've been doing since M&P was revamped, now I will keep any personal notes to the Project Life section & if you're into it as well, you can have a look at it for freebies, printables and other tips on how to add that little special touch to your own.

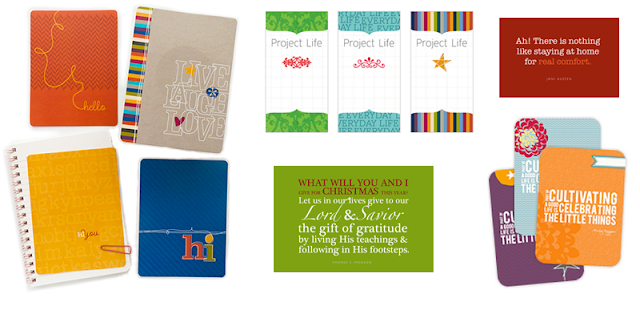
To start with, check the "free stuff" section at Becky Higgins for some amazingly cute printables, like the ones below!


I am officially in love with Project Life
Some of the free downloadables you will find available! Aren't they lovely?


Thursday 15 November 2012

Beautiful button bracelet

Buttons, buttons & more buttons! Who doesn't love buttons?! We can make bookmarks with them [Buttons + Paperclips = Bookmarks!], we can decorate a canvas [Art with buttons!] and most recently we went through a tutorial that shows how easy it is to [Make your own buttons].

But of all these tips, none seems as simple than this one to me! Wanna a new accessory to go out on the weekend? Want to add a vintage look to your outfit? Don't want to spend a penny? Go through your jar of buttons, grab some twine and 5 minutes later...

Beautiful button bracelet * now say it fast! *
Try to say this post title over and over, each time faster!

This has to be one of the best ideas I've ever seen on Pinterest (another without a url), mainly because of its simplicity. If you want to use something else other than twine, why not try using cotton yarn and making each with a different colour? You can achieve a beautiful rainbow effect! If you're having trouble figuring out how you can tighten the twine, follow this link to a video tutorial I recorded (it was shot very quickly with my phone, but it does the job of showing you how to do it). 

Wednesday 14 November 2012

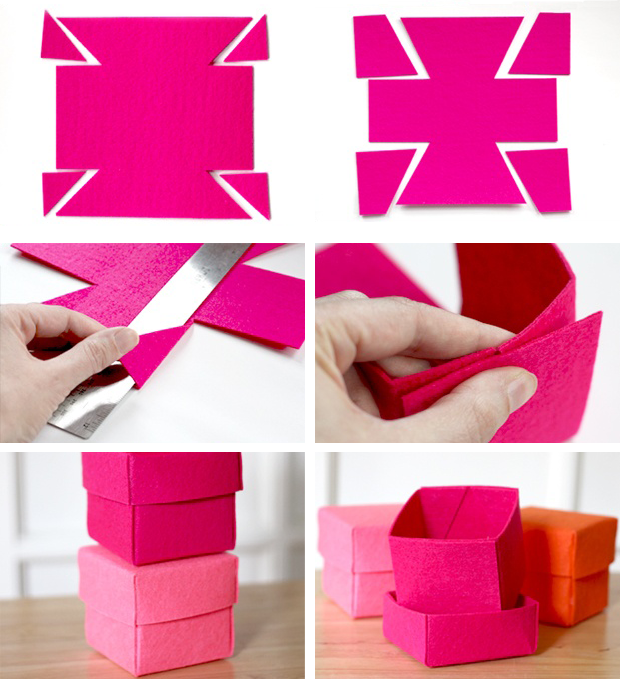
Felt boxes tutorial

Post updated on 04/03/2013 - Thanks to an anonymous post I can now credit this tutorial to How About Orange, a website that funnily enough I came across a couple of times before due to different tutorials and I absolutely love! Remember to add it to your favourites! And thanks to the anonymous reader for the tip :)

Hello... I am terribly sorry I haven't been posting here as frequently as before. I am so busy until the end of this year - and it all happened so suddenly - that I had no time to plan a strategy to keep up with the blog. However, although I didn't write a post, I spent the past two days working on M&P. I just completed a couple of projects and am in the process of taking some pictures to share them here soon, so please come back in the next few days and you won't regret!

In the mean time, I thought of sharing something I found quite nice. I was looking for a way to wrap some of my projects that I turn into presents. But I also wanted something that could be re-used. You see, I love wrapping paper. I have a drawer full of packaging & papers of gifts I've been given this year. However, I know not everyone is crafty and not everyone will just keep the packaging unless it is very pretty or useful... I guess this project below is both, not to mention very cost effective.

Easy to make felt boxes
Photo Credit: How About Oranges
This was one of those pins that no matter how far back you try to track, it just seems to be impossible to find the website where it originally came from. If you're any wiser, please let me know and I will promptly credit it =)

An A4 felt sheet costs about £0.50 and you can make two sets of small boxes (jewellery size) with it. Of course, you can always adapt the pattern to make bigger boxes. I don't think anyone receiving a present this Christmas in one of these would dare throw them away afterwards... PVA glue should do the job, but for a more resistant finish you can try superglue too. 

Saturday 10 November 2012

Where do you spend most of your time?

When I used to work in an office, it was kind of a given that most of my day would be spent sitting at a [unfortunately boring] desk. The funny thing is that now I work from home, that hasn't changed at all. Sometimes, I spend even longer than the regular 8 hours facing my computer, however, my lovely, cosy and colourful desk is a much more welcoming environment.

Nonetheless, I am sure this important space could be much nicer, so I've been collecting a few pictures of "home offices" that inspire me, in the hope I can extract ideas from them when Mr. Hunter & I get our house and I can actually make it perfect and my own.

Below is another addition to the still fairly new section {4 Home}. Ps: still taking name suggestions...

What I love about this one is the wallpaper.
Photo Credit: EverythingEtsy.com

>> What I love about this one is the wallpaper. I simply find the music notes, the vintage letters and all the details very charming. The & with a map decal is also sweet, I have an O & Z from our wedding waiting to be made up... Oops! But this is a topic for a future post, tutorial on the way...

The pink cushioned seat is the perfect detail! The top shelf and the high desk lamp are a must.
Photo Credit: EverythingEtsy.com

>> It takes 8 hours a day in the same position to realise how important a comfy chair is for our mental and physical health. I love this one! The pink cushioned seat is the perfect detail! The top shelf and the high desk lamp are a must.

The more drawers - and by drawers I mean storage space - the merrier.
Photo Credit: HomeAndInteriors.tumblr.com

>> The practical aspect of this office is right up my street. The more drawers - and by drawers I mean storage space - the merrier. Not to mention how useful are the hanging paper holder or these many boards - white, chalk, magnetic, cork... I could do with all of them!

The brilliance of this office is that it reminds me that nothing beats simplicity
Photo Credit: Decor8blog.com

>> I selected this picture for two reasons. First, I love the idea of using good old clipboards to hold notes on the wall. Second, the brilliance of this office is that it reminds me that nothing beats simplicity. And that it might look great in pictures, but a cluttered desk doesn't do you any good. Otherwise, where are you going to find space to work?


Note that I credited the websites where I originally found these pictures, however, I can't guarantee they own the rights for them. If any of these pictures belongs to you, please let me know and I will rectify it pronto.
Friday 9 November 2012

More chalkboard action!

As yesterday's chalkboard Photoshop tutorial had such a great response, I thought of sharing this other chalkboard "how to" I came across recently.
How to to give an old tin a chalkboard make-over!
Give an old tin a chalkboard make-over! Photo Credit: SerenityNow

This idea was originally published at InfarrantlyCreative, but it is signed by Amanda, from SerenityNow. And this is what you will need to turn a lame old fashioned cookie tin into a lovely personalised & re-usable storage solution (because, as I mentioned before, you can't ever have too many storage options):

Items: 
- Cookie tin (or any other tin you have in hand)
- Spray paint in your chosen colour
- Chalkboard spray paint (different from the one I mentioned in the previous post, which was just regular chalkboard paint)
- Painter’s tape (also known in the UK as masking tape)
- Silhouette vinyl (this is a more expensive touch, as Amanda mentioned, it's optional, but it does add that little extra)

How to to give an old tin a chalkboard make-over! (full tutorial available)
I don't know what looks more amazing, the revamped tin or the Nutella bread!

The "how to" is no mystery: Using the masking tape, cover the inside borders and any other area of your tin that you would like to preserve the original decoration (Amanda preserved the border with the red detail). Spray-paint following the instructions on the canister and allow enough time for it to dry. Do the same, now using the chalk spray, to cover the top.

Amanda applied the vinyl sticker to create that lovely frame for her writing. As I mentioned above, it's really up to you, you might want to try to decorate it first just with chalk... If you don't have a chalk pen, a good tip to get the writing nice and smooth with a regular chalk stick is to first trim it using a pencil sharpener. It does wonders!

If you would like to read the complete tutorial, please follow this link. As a bonus for reading Amanda's post, she shares with us a lovely recipe for her Nutella Pumpkin Cheesecake Bread, featured on the tin! Yummy yummy... :)

Thursday 8 November 2012

Chalkboard effect (Photoshop tutorial)

Yesterday I was with Mr. Hunter in Starbucks and we were looking at one of their signs and talking about how you can turn a beautiful wooden frame into a chalkboard using blackboard paint (this is the best deal I found on Amazon). We made a mind note to try this once we have our house. It would look great as a place to write notes and shopping lists in the kitchen - at least, in the dream kitchen I have in my head.

Chalkboard effect (Photoshop tutorial)
Courtney guides you through it with a series of print-screens, easy peasy!


An interesting thing though is how often we see chalkboard effects on graphic design and everywhere online. I don't know if everyone feels the same way about it, but to me it brings back nice childhood memories and I guess that's why I like it so much. Luckily, with this simple tutorial (with a couple of downloadables) by Sweet C's Designs, anyone can recreate that look using Photoshop! And by using Courtney's textured overlay, you can apply it to pretty much any font you want!

Wednesday 7 November 2012

Newspaper nails!

Hi all. I am so sorry I haven't been around for a few days. I've been a freelancer for just over a year and I still haven't found the right balance between a life with lots of work and little time or lots of time and little money... Not to mention the constant search for work! But the the whole point of M&P is so that I can get away from this world of madness and get into something that - surprisingly for some - is 100 times more creative than film work...

I thought that the section Fashion + Style could do with a new post, so here it is. My background is in Journalism. Since little, I always loved writing... And that's what I used to do until I moved to the UK. My room in my mum's house in Brazil still carries the signs of having been the "hide out" of a young and passionate journalist. This explain how quickly I fell in love with this idea... Isn't it just gorgeous?

Newspaper nails tutorial!
I simply love this idea. Photo Credit: Beautylish.com

What you'll need is basically a base and top nail varnish, newspapers (cut into 2" x 1" strips) and 70% or 91% isopropyl rubbing alcohol. After applying the base, wait until it's fully dried and then dip your nail - one at a time - into a little bowl with alcohol. Do the same with a strip of newspaper and carefully place it over your nail. Do not move it at all! Use a paper towel also dipped in alcohol to apply some pressure. Wait a few seconds and slowly remove the newspaper strip. Apply your top coat over to seal it and voilĂ , one nail done! Now move on to the next 9... =)

This tutorial is by one of the best beauty websites I know: Beautylish.com. For the full, step-by-step tutorial, visit the link. If you have time, it's worth browsing around. I like the videos very much, particularly the ones with hair-dos.

Sunday 4 November 2012

And the lucky winner is...

First of all I want to thanks everyone who entered last month's giveaway and shared it with their friends on Facebook & Twitter. You have no idea how much it brightens my day every time I got a mention on twitter or a new like on M&P page. 
  
We had 73 entries and now, without further a do, it's time to announce who the lucky winner is:

Congratulations!!!
Mandy Kathol Castellote

(entry #64)

I've already contacted you via email and I will post your notepads as soon as you get back to me with your address! 
Once again, thanks to everyone who entered!

Pair of recycled notepads - Small and Medium sizes - 20 sheets / 40 pages
For this and other of my projects for sale, visit my ETSY SHOP

The next Mango & PassionFruit #giveaway will happen when we reach 250 followers on twitter or 100 likes on Facebook! Whichever comes first! We're currently on 119 & 29, but I am positive we can do it before the holidays! =)

Have a wonderful end of Sunday!!! x x

Saturday 3 November 2012

Crochet Christmas Tree

Sorry but this is a very quick post. I spent the last 3 days on a film set - yes! That's what I do when I am not crafting... Or should I say, crafts is what I do when not filming?! Anyway, I am pretty tired, but as it's been sometime since my last Christmas post, I thought you'd like this idea... It's November already, so better get the decorations going!

Crochet Christmas Tree
It's November! Better get the Xmas decorations going...

This tutorial is by AnneMariesHaakBlog and is available in both Dutch and English. Bare in mind, this uses US crochet terms. Simple and adorable!!!

And don't forget, LESS THAN 4 HOURS until the end of the #giveaway. Tomorrow I should reveal the winner. Good luck everyone! =)

Friday 2 November 2012

Wallpaper beyond the walls returns!

I guess to see Mr. Hunter's reaction to the first post of 4 Home was one of those priceless moments in life. So I'd like to spare a second to dedicate this "The Return!" post to him.

Here is a few more ideas I came across on how to stretch and push the boundaries of wallpaper: 1) a flat headboard on the wall, instead of against it; 2) Adding texture and colour to the inside of a lampshade; 3) Repurpose the scrap bits you didn't use on your home to decorate your children's doll house and; 4) Make the gaps between your stair steps more interesting with this little touch.

If you like these four ideas, check the section 4Home for the original post!


I can't remember exactly from where each one of these pictures came from, but I know that they, as well as the ones in the original post Wallpaper beyond the walls, are either from Better Home & Gardens or Apartment Therapy or posts on Pinterest without referring links.


Thursday 1 November 2012

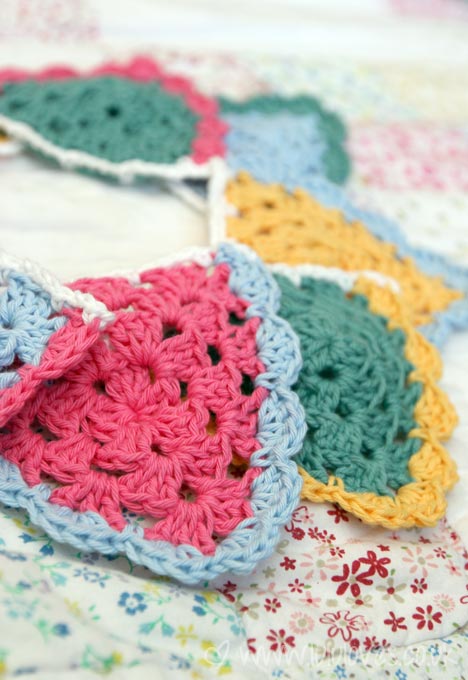
Sweet crochet bunting pattern

Although I've been writing a post a day, it's hard to keep up with the huge amount of gorgeous ideas out there!

Now that I organised the sections of M&P between Tutorials & Smoothie + the originals Crochet, Printables and the newly added 4Home, it's been easier for me to realise that sometimes I leave a too big a gap between certain types of post... Can you believe that the last crochet pattern I shared here was on the post of 15th September, Late summer tip: Crochet beach bag?!

Sweet crochet bunting pattern
Photo Credit: lululoves.co.uk

To make up for it, I thought you would like these amazing granny buntings, so kindly shared by Emma on her sweet blog www.lululoves.co.uk.

And the best part for me is that I found this pattern pretty easy to follow! But an important note to ALL US READERS! Emma uses the UK terminology, so a double crochet (dc) is actually a single crochet (sc) and what we call on this side of the Atlantic a treble (tr) is a double crochet (dc). I guess a slip stitch (sl st) is always slip stitch (sl st). =)

PS: My thoughts go to all M&P readers in US & Canada suffering after Sandy. I hope you're safe and well and that everyone can recover from this soon.