Thursday 31 January 2013

Making Ikea furniture work for you (part 2)

I finished last post saying I had decided to get a new desk and that I needed to sort out the storage in our living room... Well, let's get down to it.

Our desk space should be big enough to fit an iMac, Mr. Hunter's Macbook and, as I had already in mind to buy a sewing machine then, it would have to fit that as well... Last but not least, it should have some space to store my stationary!

The only wall the desk could go had a window, which made the search a bit harder... In the end, I decided to "make my own desk". I bought two trestle legs and a table top that was exactly the size I needed (not too deep, but wide enough to fit all that stuff I mentioned!). They're both from the Vika range and extremely cost effective.


As you can see, I got a regular filing cabinet for the stationary and it worked well underneath the desk. I also opted for having the trestles on an angle. I confess I was afraid that having them straight would leave the middle of the desk unsupported and I would probably have to add an extra single leg. To avoid that - as I thought it wouldn't look good - angled legs it was! And as I am a pretty short girl, it ended up working as an amazing foot rest, despite the many paper rolls! =)

Moving on...

Time to sort out the storage... Well, we started by changing our bookshelf, as it was old and didn't have as many shelves as we would like it to, leaving a giant mess at the bottom. 

Next step: to get a replacement for our awful TV rack. You see, in our defence, we got our old TV rack when we first moved to London 5 years ago. We were living in an already furnished flat and at the time, it was the only affordable TV rack that a) would match the rest of the furniture b) would fit the tiny space available, as the room had one of those sloped ceilings. But that's in the past now (and in the bin!).

The Expedit series is one that grew on me. Although it was conceived as a traditional bookshelf, I see it quite often on Pinterest being used "horizontally". Well, I thought "why not?!". This way our TV would go slightly higher and it would give us the option for some "hidden storage space", as you can opt to add drawers and doors to it! 


Now anything else would be a bonus and, miraculously, within our budget, I found something that seemed to be made exactly for our living room: a single bed headboard! (click here to see the original)

I know, it sounds weird and I am sure Mr. Hunter thought it also looked weird in the Ikea showroom. It was pretty hard to imagine how that could work with our living room, particularly with the red details, which were really off-putting, but I had it all in my head.  

We have this giant heater taking up half of the space behind the sofa. Half! What about the other half, then? What a waste of a wall, I thought. And when I realised I could store tons of things inside it and, as a bonus, get two extra shelves, well, I simply couldn't resist!


I used some wrapping paper around cardboard and placed it at the back following this tutorial to hide the red. 

So here we are, the living room as it is now. (You can click here to see how it was before...) You will notice that two pieces of furniture don't match the new "black & white" style, but I am working on it and I promise a "make-over" post very soon!


Tuesday 29 January 2013

Making Ikea furniture work for you (part 1)

Sometimes I wish I could click a finger and magically turn every bit of my living room into one of those amazing looking ones we see in a home decor magazine... The ceilings are high, there is always so much light and space and even the cats & dogs in the pictures seem to go with the style of the whole thing!

Well, when you're talking about a 2.5 x 5 metres space with a x amount of restrictions imposed by your estate agent, the picture in my head becomes even more foggy and seems that only magic really could do the job. But if there is something I love more than cute puppies and ice-cream it's a challenge!

At the end of last year I decided to change my living room. I spend way too much time in this space to just "get on with it" until we move to the next place (hopefully, a place 100% ours). But often, when you have enough time on your hands, it's usually because money is short... And obviously I could not afford designer furniture or anything of the sort... So Ikea was the only option I could think of.

But before a trip to the land of "make believe" (I once read in a blog that the minds behind Ikea must spend a lot of time working out the perfect lighting of the showrooms, because everything looks 10x better over there...), this time, I did my homework.

Below are some of my inspirations...

Credit / Photos Sources: 1. Homedit.com 2. Ikea Spotting 3. Draumesider 4. Erin Ever After
5. Ikea Spotting 6. La Maison d'Anna G.

As you can see, I started with my desk space... You probably noticed they all have these trestle legs. When I came across the first one, I fell in love with it and thought they would work really with my rolls of paper.

I was convinced I wanted to go with white as a colour because, annoyingly, our walls here are magnolia and we cannot change that. So natural wood colour would make it all too yellow... I was considering, however, a black worktop, thinking of adding contrast and making it a bit bold. It would also be a great surface for pictures of my craft projects.

So I had decided on changing the desk. Next step would be, within my budget, to do something about our (very) old TV rack and sort out the lack of storage space... But I will leave this for the next post.

*** To be continued ***


Photo Credit: www.bhg.com

As I said... even the dogs seem to have been chosen to fit the room...

Monday 28 January 2013

DIY piece of art (using paint chips)

Last Friday I popped to B&Q to get some paint & other basic items for some furniture DIY make-over I am about to make in my living room... (check here next week for it!) Aside from brushes, dust sheets and sandpaper, I couldn't resist, I had to pocket those cute strips with colour samples... I remember reading ages ago on Pinterest a suggestion to make little boxes with them, so I though they could come handy.

Photo Credit: How About Orange

Last Sunday morning, however, I didn't feel like making boxes, I had no use for them at the moment. But I did have an empty frame waiting to go up on the wall once I found a pretty enough picture for it. Hmmm... Pinterest never fails. A little bit of browsing around and I came across an amazing (and incredibly colourful) website: BRIT + CO. narrowed down to 25 the number of things you can make with these little paint chips.

I decided to follow the tutorial by How About Orange and make myself a pretty piece of wall art, as you can see below.

Photo Credit: Zaira Brilhante, with iPhone 4S.

First I thought of making something with chevrons, following another tutorial I had come across, but I fell in love with the idea of these triangles. But here is a very important tip for anyone wanting to have a go at it: think of the colour wheel before choosing your strips. Usually, colours that are next to each other on the wheel look great together. However, if you want to add contrast, then pick colours that sit on opposite ends. I played safe and kept my little project to one side of the wheel, avoiding greens & yellows...

Goethe's symmetric colour wheel with 'reciprocally evoked colours' includes magenta (left) as the mixture 
of red and violet, just as green is a mixture of yellow and blue (right). Source: Wikipedia.

Sunday 27 January 2013

Juliette, the giraffe (and a little surprise!)

Big news!!! (an introduction to the next tutorial)

When I started M&P the intention was to keep a record of not only my feeble DIY attempts, but projects I found online that seemed simple enough so that someone like me - with no craft background - could do them. This blog was meant to be a distraction, a therapy exercise to help me release the stress of my work...

I could not imagine 6 months ago that there would be so many handmade tutorials I was capable of doing. And that over 10 thousand people every month would read about them! I have to say that Bloglovin' and Pinterest helped a lot, but still... Today I look at a cute item and I find hard to rest until I have a go at making it.  

I guess the more you make, the more you want to keep making. And it didn't take long until I realised that there was a DIY best friend, some say a "must have", that I was lacking. Well, now I can say I feel complete lol... I got myself a sewing machine!

This is the big news that I mentioned before... I kept most of M&P posts down to what could be done without one up until now, but today I feel the sky is the limit. There is only a little obstacle ahead to be overcome: I've never used a sewing machine before in my entire life! (believe it or not...) But so far, it feels like second nature...

Now it's time for the tutorial:

Below is my first project with it... Juliette (Mr. Hunter named her). Only recently I realised how amazing felt is. Great material to work with! And since I saw this cute toy giraffe picture on Pinterest I thought to myself "I can definitely make one". But different from the felt robots I had showed how to make here before, I felt that for this one I needed a sewing machine...

Photo Credit: Zaira Brilhante, with iPhone 4S

Materials: 
- 2 x 6" squares of felt
- Scrap bits of felt for the details
- Embroidery thread for the eye, mouth and tail
- Optional: a ribbon for the tag detail (I find it cute).

How to:
1. Download this template (please, if you want to make it available on your website, link to this page)
2. Cut two pieces of felt using the template above.
3. The making of it is straight forward. The only things you need to be aware of are:

a) It's much easier to add the details (the circles, eyes & mouth before you join the front and back).
b) Remember to work on the reverse side as you will turn it inside out once you sew the front/back together.
c) For the ears and the back hair, what I did was to cut two rectangles and only shape them after I had sewed together the back and front. I haven't got pictures of it, but I hope the scheme on the right gives you an idea... Once you turn your sewed piece inside out, the ears and back hair will be facing the right way.

4. I stuffed Juliette and finished it off by hand, adding the tail & the little pink label last.

I know this tutorial could be more visual. I will probably update it when I make Juliette a sister or a brother! But in the mean time, please drop me a line if you need a hand. :)

Saturday 26 January 2013

Quick tip: pom-pom yarn

This is a quick post. I have lots to do this weekend though and should share with you some pretty exciting news... At least for me, but I am sure you will love it too.

This tutorial reminded me of my childhood. My mum was never a DIY person, but there was one thing she learnt how to make and taught me: an all yarn made doll. Well, the head was made of china, but everything else was a combination of pom-poms and pom-pom like shapes (kind of hard to explain or imagine, I know).

Photo Credit: Vivid (please)

Well, I am sure this will come handy on many DIY projects. The picture is straight forward, but if you want to read the full tutorial follow this link: Vivid (please). Any questions, drop me a line! :) 

Ah, and I should come back on Sunday with my lovely news!

xx

Wednesday 23 January 2013

Cute and simple to make, Yoda is

I have to say I tick several boxes of the geek list: I graduated in IT before doing Journalism, I absolutely loved Animes and video games when I was a kid - and still can't say no to Mario Kart Wii - and, most recently, one of my favourite series is Big Bang Theory. However, I was never into Star Wars or Star Trek... (to Mr. Hunter's utmost disbelief and indignation). I couldn't even understand how or why some people liked one but not the other, never being able myself to put them apart...

Well, you can imagine Mr. Hunter's surprise when he saw my latest crochet project... But I just couldn't help it, he is soooo cute.

Photo by: Zaira Brilhante, with Pentax K-x

I found the tutorial at Happy Together, a simply wonderful blog run by Jessica Fediw, who not only wrote this lovely crochet pattern (US terms) but decided to share it with us! (Check her tutorials section for amazing fashion ideas).

However, I found out about this particular pattern when I visited another blog, Sweet T Makes Three (that, like M&P, plays with lots of different types of craft, DIY, handmade ideas...). Jenn added her two cents to this project by adding "fortune cookie like" messages to Yoda's belt. To make it even more authentic, she didn't miss on any detail and wrote them as the little ancient Jedi master would say and used a Star Wars font!

Below you can see my attempt. The only change I made was on the coat. I didn't want to make three pieces and join them and the option to make it as a one piece pattern ended up way too small. I also wanted it to have a hood, a bit like the one on Sweet T Makes Three. I will try to write a pattern for it, but I hope you can get an idea just by the picture below. I started from the bottom and, in US terms, I used only sc until the hood part, when I used 2 sc 1 hdc 1 dc 2 trc 1 dc 1 hdc 2 sc for the two last rows.

Note: To create the arm holes I used 6 ch and to move around and get the hook in the right position to move from one part to the other I used sl st...

If you love him, but don't want to make one... Well, Little Yoda is for sale on my ETSY shop...

Photo by Zaira Brilhante, with Pentax K-x

Photo by Zaira Brilhante, with Pentax K-x


Sunday 20 January 2013

"To keep her caged would just delay the spring"

Apologies for this not that obvious post title, but I simply love this Travis song, The Cage, beautiful lyrics, it's worth listening to... Although it's hard to think of spring with the snow falling outside.

Anyway, when I came across the little photo below on Pinterest, I decided to save it as I still have a beautiful cage from my wedding stored at Mr. Hunter's mum's house in Windsor (storage space in London is always a hassle). Next time we visit, I must remember to bring it home and try this out.


The caption mentioned Ballard Designs and, although I couldn't find it on their website, it suggests this is a very expensive item. As the original Pin was tiny and didn't come with a tutorial, I went browsing the web and found this website! Lisaloria.blogspot.co.uk had the trouble of putting together a great "how-to" tutorial, guiding us through each step of turning an ordinary birdcage into a beautiful desk organiser! 

It's all about making it your own and adding little personal touches. If you do try it, please send me your pictures! :)

Thursday 17 January 2013

Burlap or not burlap?

It's almost 2am and I had a very long day, but I had to share it here before I forget about it...

In my last trip to Horncastle (my personal arts & crafts version of paradise) over Christmas, I stocked up in some supplies: different ribbons, original colour felts, lovely buttons and... burlap! Or, as I found out, hessian - apparently that's how it's called here in the UK. Living and learning.

The thing is, when I bought it, I had a DIY project in mind... But it's not the first time that after acquiring a material, I simply can't remember what I had planned for it. In any case, Pinterest never disappoints me. Last night I came across this wonderful idea and I had not only to pin it, but share over here and, mostly, try out this coming weekend! So before it flies out of my mind...

Photo Credit: I Spy DIY

This tutorial by Jenni, from I Spy DIY is straight forward and opens up a world of possibilities with burlap... (ops! hessian). Think of how many wedding decorations, cushions, place-mats, storage bins can be decorated using this technique!

The table runner she shows us how to do is just the start of an entire collection, if you have the time & energy! The materials are the ones you can see in the picture, just follow the link above for the "how to".

PS: And if you're a fashion enthusiast, don't forget to browse through her Clothing, Accessory & Jewellery DIY pages. Totally a must read! :)


Photo Credit: I Spy DIY

Monday 14 January 2013

Sweet tooth!

I love sweets! Whilst Mr. Hunter loves to prepare a tasty yummy dinner, all that I often care about is the dessert. But having grown up in Brazil, dessert for me is almost a synonym for condensed milk.

You can google it if you want: Pudim, Brigadeiro, Beijinho, Cajuzinho... Even Doce de Leite! Pretty much every traditional Brazilian dessert uses at least 1 tin of condensed milk, what makes them very rich for English standards...

I guess before Mr. Hunter mentioned, I never really stopped to think about it. How could that be? There was bound to exist at least one sweet I could remember from the top of my head that didn't require condensed milk! Think, think, think... No luck, it just wouldn't come to me...

Last weekend, however, I was walking with my cousin in Covent Garden when I looked at Lush's window - in case you don't know, Lush is a handmade cosmetic shop and it smells amazing! Every time I enter it, I have to stop myself from wanting to eat their soaps, shower jellies and bath bombs - I know, I need help... Anyway, all of a sudden I felt this desire to eat Quindim! That was it, Quindim! One Brazilian dessert that doesn't use condensed milk!

So, after this long introduction... Here it goes the recipe for this amazing treat for those that like me, have a pretty sweet tooth. Quindim has the same texture as jelly on top, but is thick in the bottom, as it sets with most of the coconut to one half... I hope you enjoy it!

Photo Credit: http://donnagatta.blogspot.co.uk/

Ingredients:

- 10 egg yokes (I know, if you don't like eggs, give up...)
- 50g of desiccated coconut
- 150ml of coconut milk (try to get fresh coconut milk if you can... it tastes nicer!)
- About 200g of caster sugar
- Butter or spread to coat the bottom of your tray (if using silicone ones you won't need it) and a bit more sugar to sprinkle it.

*** Tip: When separating the eggs, why not save your whites to make a merengue?! 

How to:

1. Start by pre-heating your oven to 110°C.
2. In a bowl, add all the ingredients and stir gently.
3. Coat your tray & sprinkle it with a bit more caster sugar before placing the mixture.
4. Bake it in bain-marie (water-bath) for 30 to 50 minutes. To check if the Quindim is ready, stick a toothpick until the bottom and if it comes out dry, it means you're safe to remove it from the oven! 
5. Take it out of the oven and wait until it cools down a bit. If you try to plate it whilst it is still too hot or after it goes cold, it will very likely break, so make sure to do with the Quindim still slightly warm. 

Friday 11 January 2013

What are you going to do in 2013? (part 2)

I am sorry it took too long since the last post, but the year only starts for me on the 10th of January. This is because the 9th is my birthday and everything stays sort of on "stand-by" until then...

But life is finally back to normal, or as normal as it can be. And I am back!

Continuing with my New Year's goals:

Resolution # 3:
Travel more... There is something about travelling that brings a smile to my face. I started 2012 travelling, but I didn't keep it up over the year. In 2013, however, I plan to visit at least a couple of new places.

Great inspiration... Les Robes Géographiques
Photo Credit: www.elisabethlecourt.com

Aren't these a great inspiration?! Les Robes Géographiques is the work of London based artist Elisabeth Lecourt. I simply love it! It makes me want to give it a go and try folding some old maps to see if it will look as cute as these...


Resolution # 4:
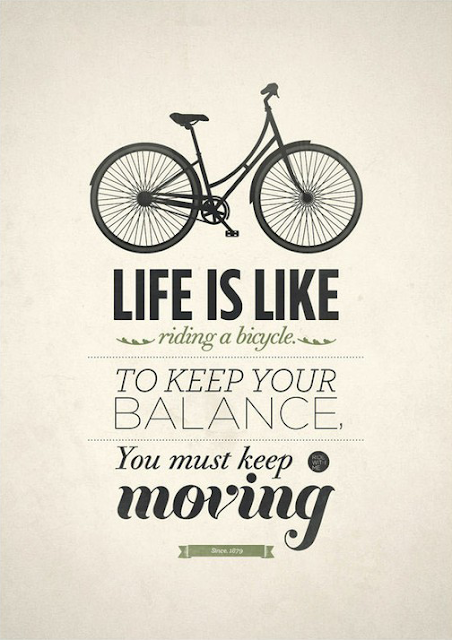
Keep moving on... In every way! Only very recently I rediscovered a passion for cycling. It helps that I am surrounded by beautiful parks... Well, this year I want to make the most of it!

Keep moving on... In every way!
Poster by: http://designyoutrust.com


I know this is not my average post - to start, it has no DIY per se - but sometimes all we need before starting a new creative project is that little boost of inspiration... And every beginning of a new year I feel that I need to stock up on it, so that later on, in the months to come, I can always look back and re-energise myself with this freshness and excitement that only the month of January seems to have...

Happy New Year everyone! 
I hope 2013 brings you lots of crafty & creative moments to brighten your day!