Fact # 1
I eat a lot of cereal. I know, a lot of people do, but cereal for me is not a breakfast thing. I can have cereal anytime, day or night. I remember a period during my early 20s that I went on a funny diet of light chocolate milk and cereal for lunch!
Fact # 2
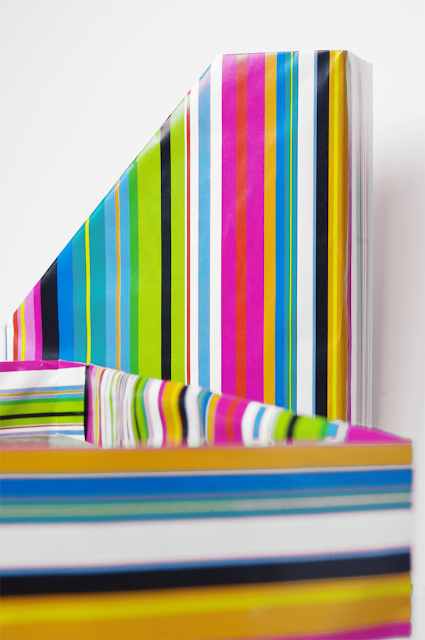
My office space at home is not that big, so I try to keep it as tidy as I can. Cute stationary holders, however, tend to be very pricy. I wasn't keen on spending that much, so I had to come up with a cheap but efficient solution. That was when I figured out this formula:
Cereal Boxes + Nice Wrapping Paper + Mod Podge = DIY Magazines & CDs organisers
 |
| Photo Credit: Zaira Brilhante, with Pentax K-x |
There is no mystery really, you just need to be careful not to use too much mod podge/glue. I also find that thicker paper (150g/m2 or over) is better to work with, but that really depends on you.
1 - Cut the cereal box in the shape you want it to be, place over your paper (wrong side) and, with a pencil, trace around it. You will notice that on the top, I spared some paper that I folded inwards, to give it a nice finish. For that, with the assistance of a ruler, leave a 2.5cm gap and trace a new line, parallel to your top border marking. For the sides, I left about 1cm on one end only and for the bottom I left about 5cm, but it really depends on the size of each box, so make sure you leave enough paper to fold and fix it like you would do wrapping a present.
 |
| Photo Credit: Zaira Brilhante, with Pentax K-x |
2 - If you are working with kids, I suggest you draw dashed lines marking all the corners and places you will need to fold your paper, just so they don't get confused. Make 2.5cm cuts on the 4 top corners (until the box border marking). This will help to avoid air bubbles when folding the top paper inwards and it will give your work a more polished finish.
3 - Choose a corner to start from. If you measured it correctly, don't start using the very edge of the paper, but leave the side 1cm flap to be folded later on. Using a brush, spread mod podge or a good craft PVA clear glue over one side of the box and fix the paper. Move around until you covered all the sides. Choose if you want the 1cm flap to go over or under. It really depends on the pattern you're working with.
4 - Fold and fix the bottom, the same way you would do if wrapping a gift. Apply mod podge to the tips of the paper on top and fold them inwards. Work one side at a time. If the interior of the box is damaged or if you want to reinforce it, use brown paper inside. It looks great!
 |
| Photo Credit: Zaira Brilhante, with Pentax K-x |


I really like these! I am going to make some, although they probably won't be as neat as yours.
ReplyDeleteيحدث الكثير من المتاعب لجميع أصحاب المنازل سواء كبار أو صغار لأن الجميع في المنزل يخافون من الفئران
ReplyDeleteشركة مكافحة حشرات
شركة مكافحة النمل الابيض بجازان
شركة مكافحة حشرات بجازان
شركة رش مبيدات بجازان